How to measure the splashback panels yourself
You can measure the area on which the solid glass splashbacks must be installed. Just be patient and know where the pitfalls are. Just remember, no kitchen is perfect. All cupboards are out with a couple of millimetres and it is those millimetres, if added together, determines if the panels will fit or not. A good tip, right at the beginning, always make the panels slightly shorter if in doubt, since you cannot alter the panel once it has been toughened.
Always design the panels slightly smaller than actual, because you cannot alter the size after the glass has been toughened !
So lets look at the kitchen that we would like to install solid glass splashbacks. I will use the one described in the article How to Measure the glass Splashbacks for a quote. We assume the design as in the diagram below.
 |
| Keep measuring simple. Divide the area into three sections and measure the length and width of each rectangle in either cm or mm. |
We have our three panels;
- Panel A: Behind the stove and goes right up to the ceiling
- Panel B: on the left and ends against a wall on the left and has one plug
- Panel C: on the right will be fitted flush against Panel A, but there is an open space on the right, so no limitations there. It has two plugs that need to be cut out.
In the article How to Measure the glass Splashbacks for a quote, we made some measurements but they were very rough estimates so we cannot use them, however, always use those measurements to check against the final measurements, the first ones cannot be smaller than what you will measure now! That is very important.
Let's have a look what the reality is, i.e. how square and true is you kitchen installed.
 |
| The skewness of your kitchen multiplied by a factor of, lets say 10. No panels are ever 100% parallel, hardly any plug is on the same height and the extractor fans are never dead centre. |
The image is a bit exaggerated, but it is only for illustration purposes to show where the pitfalls are.
- Left cupboard: The left side is slightly higher than the right and it tilts over to the right (in most cases the offset is usually 3-7mm).
- Right cupboard: This is a bit of a bummer and it happens. The whole carcass is tilted to the right, but notice a big problem, the bottom of the cupboard is not straight. It hardly happens with small cupboards, but with long ones, above 1.5m, they do tend to warp a little, in most cases, the bottom bends down. Also, the bottom left is slightly lower than the bottom right, the same as Panel B.
- The extractor fan: They are all skew and off centre.
- Plugs: They never align to the same height.
So how do we go about measuring?
First thing, don't panic.
We will measure Panel A first, then Panel B and lastly Panel C. If panel B had an open side, we would measure it last and Panel B second. The last items will be the cut-outs for plugs and extractor fan fixing holes.
Measuring Panel A:
- Draw a vertical line from the work surface at 90° up to the ceiling and mark clearly with a sharp pencil on the wall. Do the same but with a horizontal line across the length of the area where the splashback must be installed. These two lines are important since you will be measuring from the cupboards/walls to the line and then from the line to the other side. Remember, it is difficult and very inaccurate to make measurements between two objects.
- Draw a line on the wall with 90° angle up from the granite top to the corner of the left cupboard that meets the ceiling (or cornice). This line must be vertical and meet the worktop at a 90° angle. It will miss the bottom corner of the left cupboard. If it is not too much, less then 5mm or so, it's ok. If it is more, call your kitchen cupboard installer to align the carcass.
- Do the same on the right side of Panel A. Here you will have a gap at the top of the cupboard. That is not so important since it is high up and you will not notice it. Remember the gaps are filled with silicon after installation. But more about that later.
- Measure the distance between work surface and bottom of cupboards. (distance from work surface to line + bottom of work surface to line = total distance)
- Now measure the width of each panel (see the arrows at the bottom of the drawing).
- Plugs: The size of each plug hole will be 110x110mm. You need to measure the height from the work top and then the distance from the edges (left and right edge).
- Extractor fan holes: These do not have to be too precise, There are usually two holes for the bolts of the fan system, and two holes close to the ceiling or cornice which holds the chimney of the extractor fan. Make the diameter of the holes about 50mm or larger. just make sure that when placing the extractor fan back, that the hole does not protrude out of the frame from the extractor fan, that really looks ugly.
Compensating measurements for installation
The next step is to reduce each panel with about 2-3mm on each side so that it will fit. So with Panel A, you can reduce the top with 4mm and the bottom with 2mm, reduce the sides with about 3mm on each side. That gives 6mm space on either side which will be filled with either clear or white silicon. More about that later.
The left panel is tricky, reduce the left side with 5mm. The right hand side must be FLUSH against panel A, so extent the right side with the same amount as with which you reduced the left side of Panel A. Same applies to the right Panel C, but do not reduce the right hand side because it is open, there is no restrictions.
Both the left and right panel's height differ. So measure from the base to the dotted line and from the dotted line to the underside of the cupboard, reduce 2mm from the bottom and about 4mm from the top. Remember, these two panels will be slightly skew. Left corner is lower than the right corner.
Lets have a look at an actual sample. Below is a sample before the splashback was installed. Very similar to our sample with three panels, one for the stove, small panels to the right and left. Each panel with plugs and holes for the extractor fan required.
 |
| Before the installation of the splashback. Three panels are required. One behind the stove, and two to the left and right. Plug holes must be measured as well as holes for the extractor fan. |
Lets have a look at the actual diagram for Panel A:
 |
| Actual measurements for the centre panel as in the previous image |
 |
| Lets look at Panel B: This time there are no cut-outs for plugs and the panel is simple to measure, it was a perfect rectangle (yippee !!) . |
 |
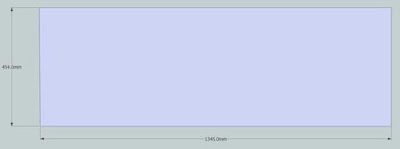
| The right panel. Notice the plug hole, 110x110mm. The left height is 450mm and the right is 445mm. 5 mm can make a difference. |
 |
| The final installation of the three panels. |
The final step is to touch up, not your mistakes, but the edges between the straight glass and rough wall. I will go into silicone and attaching the splashback to the wall alter, but in this installation I used white silicone and clear silicone along the bottom between the glass and black granite top.


Comments
Post a Comment